Eiseverywhere (aka eventscloud.com)
This guide will describe how to get Shibboleth 3.2.x working with Eiseverywhere (aka eventscloud.com). Currently the vendor does not have documentation on this integration, here is how I got it working. There are two parts to get this working, the Shibboleth IDP side and then the UI within Eiseverywhere.
Shibboleth IDP Configuration
metadata-providers.xml
	<MetadataProvider id="eiseverywhere"
		xsi:type="FilesystemMetadataProvider"
		xmlns="urn:mace:shibboleth:2.0:metadata"
		metadataFile="%{idp.home}/metadata/eiseverywhere.xml"
		failFastInitialization="false" />
attribute-filter.xml
<AttributeFilterPolicy id="eiseverywhere">
<PolicyRequirementRule xsi:type="OR">
<Rule xsi:type="Requester" value="https://www.eiseverywhere.com/saml/accounts" />
<Rule xsi:type="Requester" value="https://www.eiseverywhere.com/saml/" />
</PolicyRequirementRule>
<AttributeRule attributeID="username">
<PermitValueRule xsi:type="ANY" />
</AttributeRule>
<AttributeRule attributeID="mail">
<PermitValueRule xsi:type="ANY" />
</AttributeRule>
<AttributeRule attributeID="first_name">
<PermitValueRule xsi:type="ANY" />
</AttributeRule>
<AttributeRule attributeID="sn">
<PermitValueRule xsi:type="ANY" />
</AttributeRule>
<AttributeRule attributeID="department">
<PermitValueRule xsi:type="ANY" />
</AttributeRule>
<AttributeRule attributeID="eduPersonPrimaryAffiliation">
<PermitValueRule xsi:type="ANY" />
</AttributeRule>
<AttributeRule attributeID="phone">
<PermitValueRule xsi:type="ANY" />
</AttributeRule>
<AttributeRule attributeID="title">
<PermitValueRule xsi:type="ANY" />
</AttributeRule>
<AttributeRule attributeID="displayName">
<PermitValueRule xsi:type="ANY" />
</AttributeRule>
<AttributeRule attributeID="employeeNumber">
<PermitValueRule xsi:type="ANY" />
</AttributeRule>
</AttributeFilterPolicy>
relying-party.xml
  			<bean parent="RelyingPartyByName"
				c:relyingPartyIds="#{{'https://www.eiseverywhere.com/saml/accounts','https://www.eiseverywhere.com/saml/'}}">
				<property name="profileConfigurations">
					<list>
			         <bean parent="SAML2.SSO"
							p:encryptAssertions="false"
						/>
					</list>
				</property>
			</bean>
Within https://www.eiseverywhere.com/
- Create an event
- Click on Adv. Settings/ Integrations
- Click on SAML Settings
- Paste in your IDP's Metadata
- Click on Update Metadata; this will create an Eiseverywhere initiated sigon session
- Once you have logged in to your IDP, you will be posted back to Eiseverywhere
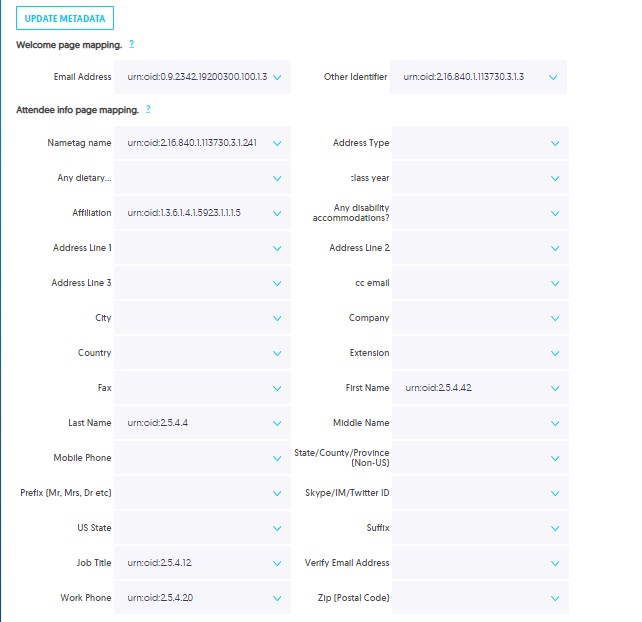
- Update the mappings per your requirements
- Edit the Other Settings if needed; e.g. Initiate SAML When First Visiting the Welcome page.
To enable SSO
- Within Adv. Settings, click on Pre-load Data
- Ensure that Pre-load via SSO is enabled